
 2914
2914
Signing on to the Zoom Scheduler Chrome Extension
- The Zoom Scheduler Chrome extension can be found in the upp right corner of your Chrome browser.
- Click on it to Sign in to your Zoom Account.
- Once signed in, you will have additional options in the Chrome Extension:
- Schedule a Meeting: Click Schedule a Meeting to open up a new event on Google Calendar.
- Start a Meeting: Hover over Start a Meeting to choose to start with video or start without video. Learn more about instant meetings.
- Name/email address: Click on your name or email address to open your Zoom profile page.
Scheduling a Meeting From Google Calendar
-
- Create a new calendar event or edit an existing calendar event.
- Open the additional options for the event.
- For a new calendar event, click More Options.
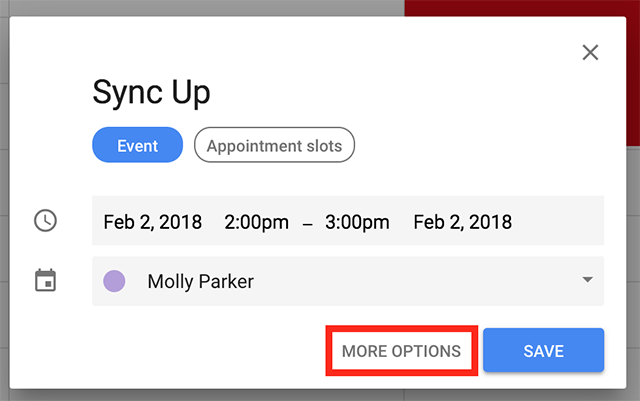
- For an existing calendar event, click the Pencil icon.
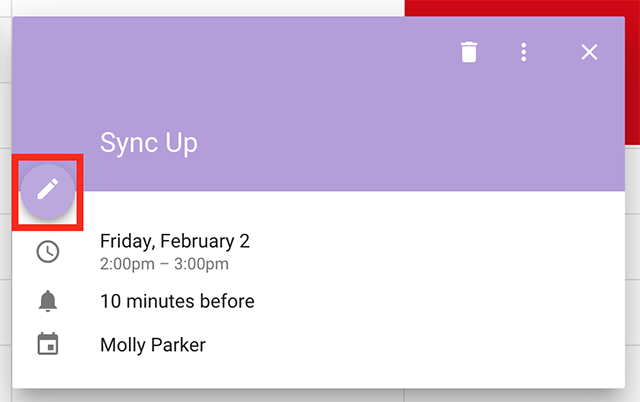
- For a new calendar event, click More Options.
- Click Make it a Zoom Meeting.
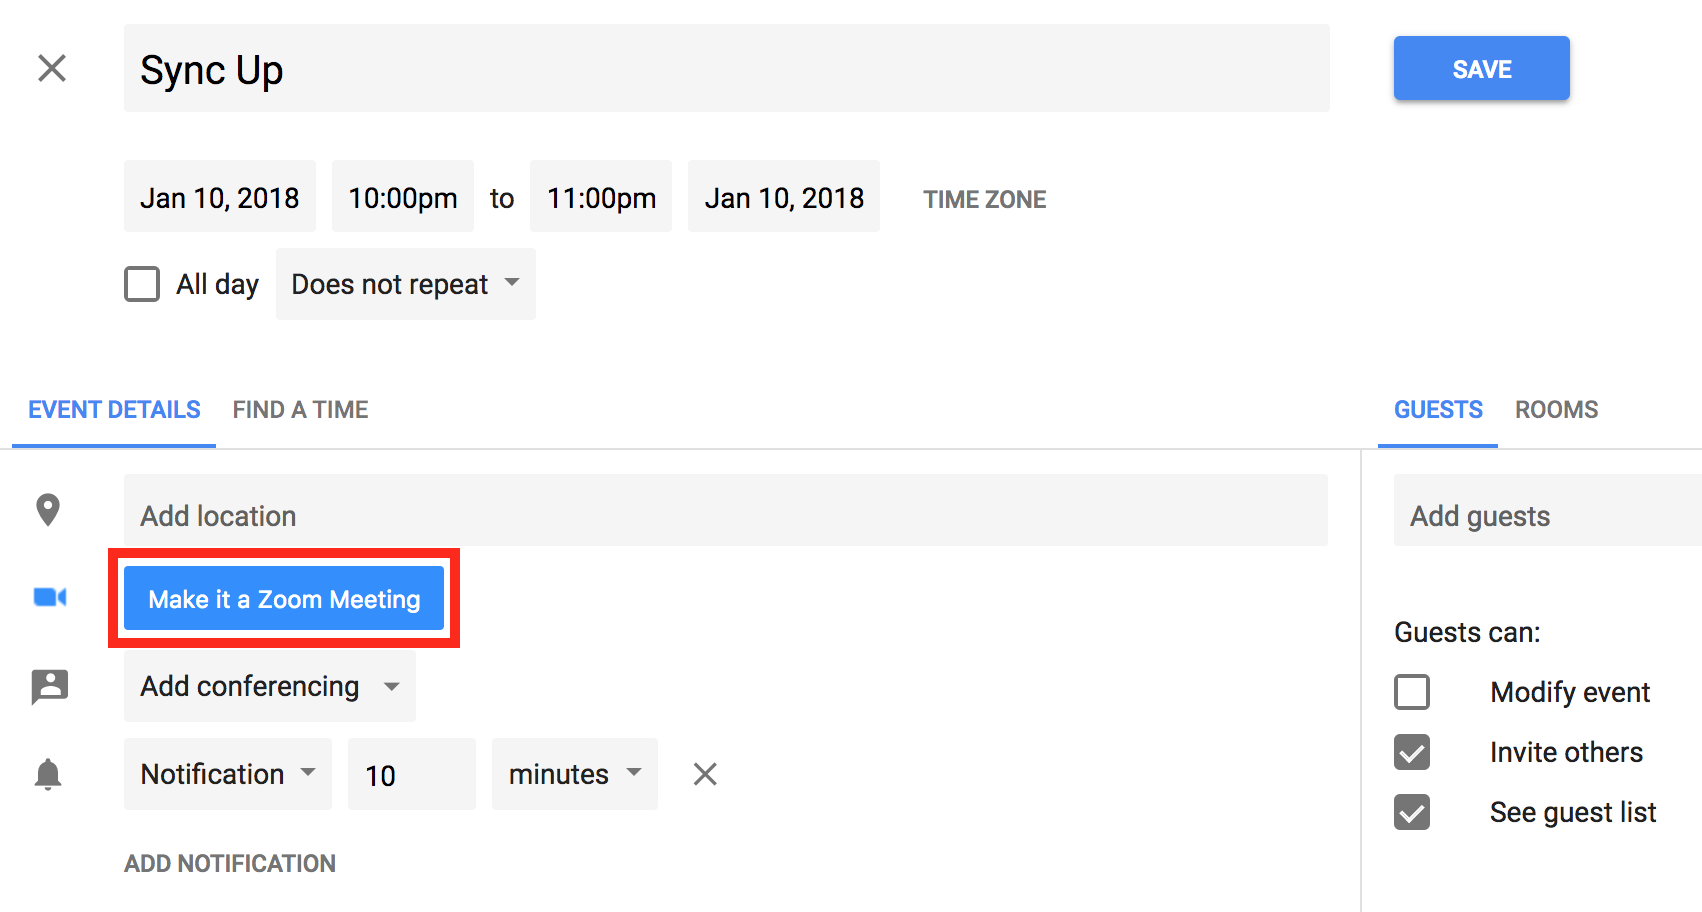
- This will create a Zoom meeting and populate the meeting details in the description.
- Click Save.
-
Note: If you are rescheduling a Zoom meeting from Google Calendar, edit the calendar entry and change the meeting date/time. Do not drag and drop the calendar event or copy the meeting details to a different calendar entry.
Chrome Extension Scheduling Options
The Chrome extension scheduling options can be displayed each time you schedule a meeting, or you can automatically schedule the meeting with the settings as your last meeting scheduled with the extension.

- Host Video: Choose if you would like the host video on or off when joining the meeting. Even if you choose off, the host will have the option to start their video.
- Participant Video: Choose if you would like the participants' videos on or off when joining the meeting. Even if you choose off, the participants will have the option to start their video.
- Audio: choose whether to allow users to call in via Telephone only, Computer Audio only, Telephone and Computer Audio (both), or 3rd Party Audio (if enabled for your account).
- Require Meeting Password: You can select and input your meeting password here. Joining participants will be required to input this before joining your scheduled meeting.
- Enable join before host: Allow participants to join the meeting without you or before you join. The meeting will end after 40-minutes for Basic (free) subscribers.
- Mute Participants Upon Entry: If join before host is not enabled, this will mute all participants as they join the meeting.
- Use Personal Meeting ID: Check this if you want to use your Personal Meeting ID. If not selected, a random unique meeting ID will be generated.
- Add watermark that identifies the viewing participant: Add a watermark on shared content during the meeting. Learn more about adding a watermark.
- Record the meeting automatically: Check this if you want the meeting to be automatically recorded. Select if you want it to be recorded locally (to your computer) or to the cloud (zoom.us/recording).
- List in the Public Event List: Add this meeting to your Public Event List (if enabled for your account). Learn more about the Public Event List.
- Schedule For: If you have scheduling privilege for another user, you will be able to choose who you want to schedule for from the drop down. Learn more about scheduling privilege.
- Alternative Hosts: Enter the email address of another Zoom user who is Licensed, on your account to allow them to start the meeting in your absence. Read more about Alternative Host.
-
Display Scheduling Options Each Time
By default, the meeting will be scheduled with the options that you used for your last meeting. However, you can have the scheduling options appear each time.
- Click the extension icon next to your address bar.
- Click the gear icon.
- Check one of the following options:
- Require Meeting Password: Manually Input Each Time
- Schedule for: Allow me to choose each time
- Alternative host: Allow me to choose each time
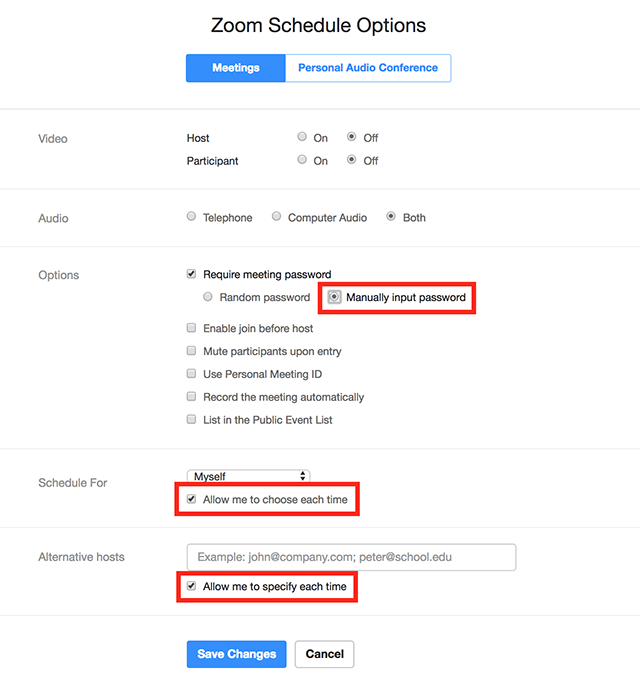
- The scheduling options will now appear each time you choose Make it a Zoom Meeting.
Session Has Expired
If you receive a message that your session has expired ("Your Zoom Chrome Extension session has expired."), you need to login to the Chrome extension again.
- Click the Zoom extension icon next to your address bar.
- Sign in to your Zoom account.


